Your Free Purchase Order Software is Getting a New Home

We’re getting ready to roll out the 2026 release of SpendMap, which will include cool new features for the free Purchasing and Receiving Modules.

As part of this release, we are upgrading our Cloud infrastructure, which will result in a change to the URL for your Login Page on Friday, July 17, 2026. We will send out an email and also add a note to your existing Login Page with full details, including instructions on updating your browser bookmarks, in the days leading up to the change.

Stay tuned for more about the 2026 release of SpendMap!

How to Add Terms and Conditions to Purchase Orders in SpendMap

Jody works in the hospitality industry in California and was asking how to include terms and conditions (Ts and Cs) on her Purchase Order form in the Free Version of SpendMap.

Short Terms Text

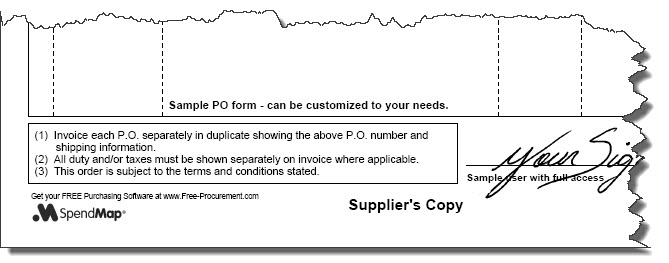
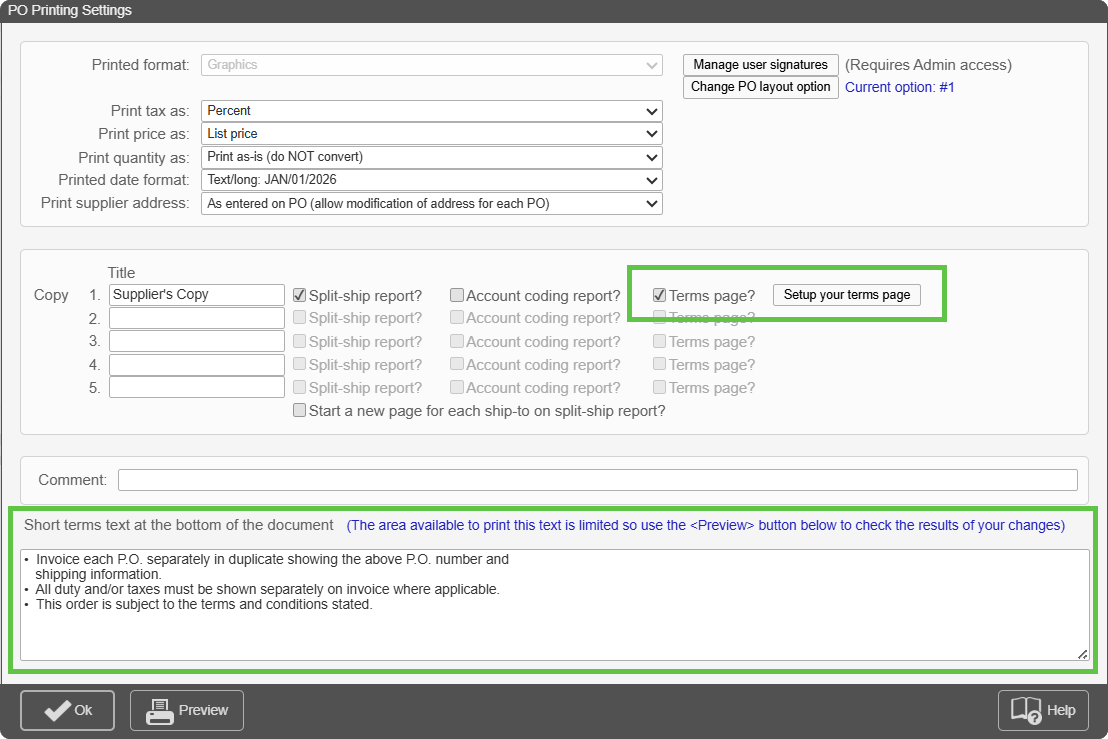
If you just need a few lines of text, try using the Short Terms Text in PO Printing Settings. The text will be included at the bottom of the PO form, next to your signature line.  Here’s the menu where you can find the setting…
– Setup System (“wrench” icon at top of Main Menu) > Purchase order settings > PO printing settings > Settings

Short terms and conditions on PO form

Separate (Long) Terms and Conditions Page

If you need more than just a few lines of text, you can create a full Terms and Conditions Page that will automatically accompany each PO that is printed or e-mailed to your suppliers.  

Just select the option “Terms Page?”, and then click the [Setup Your Terms Page] button and either 1) enter the text for your Terms Page, or 2) if you already have an existing Terms Page, you can scan it and upload it into SpendMap as an image file.

Manual PO Numbers in your Free Purchase Order Software

By default, the Free Version of SpendMap will automatically assign incrementing PO numbers to each new Purchase Order that you enter in the system.  You can set up your “Next PO number” during the Setup Wizard that runs automatically when you log into SpendMap for the first time.

But if you prefer to enter your PO numbers manually for each new order, just select the following menu in in the Purchasing Module…
– Setup system (“wrench” icon) > Incrementing document number sets > POs

Then modify PO Number Set A per the screenshot, below.  From that point on, whenever you create a new Purchase Order, the PO Number will be blank and you can enter it manually.

Finally, please note that you can have more than one “PO number set”, for example, if you need multiple sequences of incrementing numbers, or if you want the number to increment for some orders while entering it manually for other orders.

How to edit company address in your free PO Software

Some people are so excited to start using their free Purchase Order Software that they rush through the Setup Wizard, only to realize later that they need to change the company address displayed at the top of the Purchase Order form…
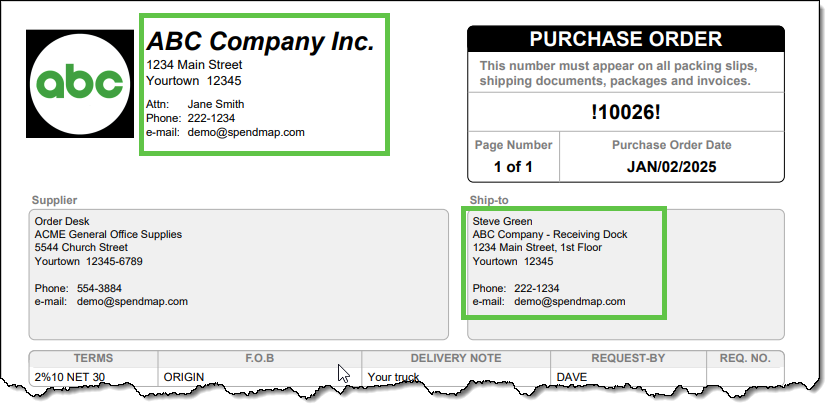
But don’t worry! It’s completely normal to feel like a kid at Christmas when you get great tools for free. The good news? It’s easy to update your company address after the fact. 😊

There are two ways to modify your Bill-To or Ship-To address information after completing the Setup Wizard…

Option 1: Change the Default Bill-To or Ship-To Address for All New POs

To update the default Bill-To or Ship-To address for future Purchase Orders:

  1. Navigate to the Cost Center section in the left-hand menu.
  2. Look for the codes BILL-TO and SHIP-TO in the list.
  3. Click the Pencil (modify) icon in the Action column on the right-hand side of the grid.

This will allow you to edit the address information associated with those codes. The updated address will automatically appear on all new POs created in SpendMap moving forward.

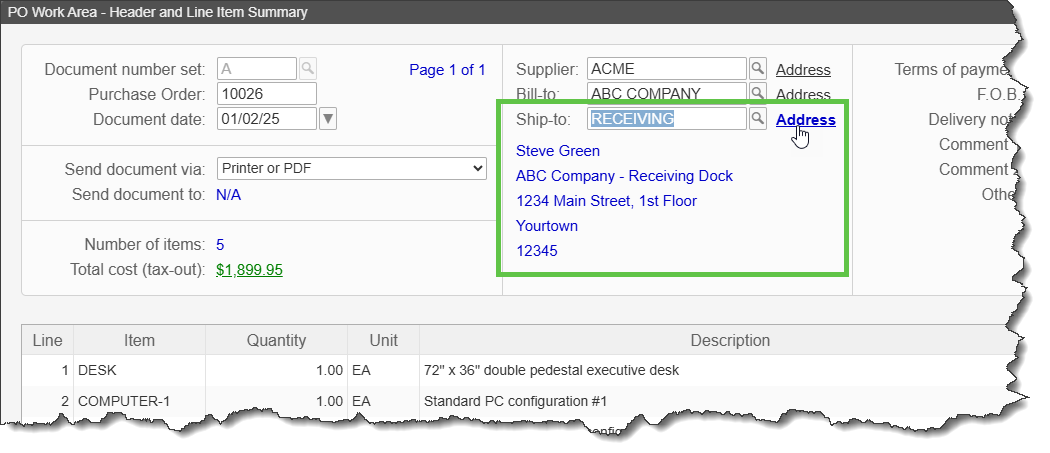
Option 2: Modify the Address for a Specific PO Only

If you want to update the Bill-To or Ship-To address for a single Purchase Order (without changing the default for future POs):

  1. On the PO Header Screen, locate the Bill-To and Ship-To fields.
  2. Click the Address hyperlink next to those fields.

This lets you adjust the address information for that specific PO without affecting other POs.
New Video: Free Receiving Module Overview

Here’s another new video tutorial, this time on the Receiving Module, which is used to keep track of receipts against Purchase Orders in SpendMap, so you can keep an eye on late orders, track item history, and report on the status of your Purchase Orders.

Please like and share to help spread the word about SpendMap. Thanks 🙂

Get the Receiving Module for free!

All you have to do is complete the Walkthrough Tutorial called “Free Receiving Module Challenge”, at the top of the Main Menu in your free Purchase Order Software from SpendMap…

New Video: Free Purchasing Module Overview

We’re in the process of updating our video tutorials to show the latest release of SpendMap, Version 16.

Here’s one that reviews what you get in the free Purchasing Module

This video covers various ways to create Purchase Orders in SpendMap quickly, as well as options for your PO forms, how to manage Change Orders, and how to track your budgets for more proactive spend control.

Please like and share the video to help spread the word about this great, free Purchase Order Software. Your friends and colleagues will appreciate it, and so will we 🙂

Add Signature to PO Form in your Free Purchase Order Software

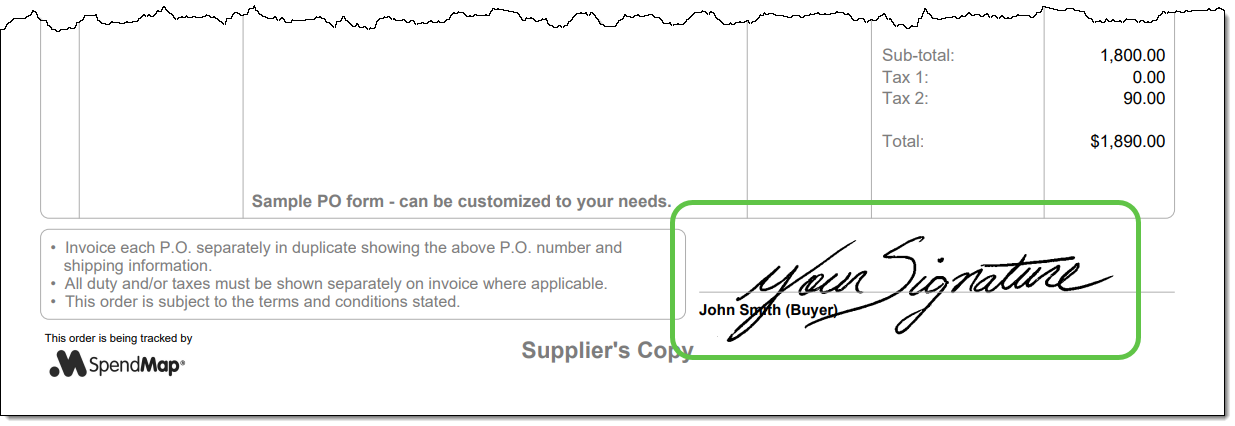
If you’re emailing Purchase Orders to your suppliers directly from SpendMap, or if you’re just tired of signing your Purchase Orders, you can add an “electronic signature” so that your orders will be signed automatically when printed or emailed…

Start by selecting the following menu in the System Setup section…

Select the [Manage User Signatures] button at the top-right, and then use the icons in the Action column to add signatures for one or more users (the applicable signature will be included when the respective user prints or emails their Purchase Orders)…

Meet the New SpendMap: Faster and Easier Spend Control for your Business!

SpendMap has been redesigned to help you get your work done faster, with fewer steps, fewer clicks, and easier access to the information that you need to manage your company’s Purchasing process and control spending.

These videos cover what’s included in the free Purchase Order and Receiving Modules…

Version 16 is live for new registrations. Existing clients running v15 in the Cloud will be updated automatically in the coming weeks.

We think you’ll fall in love with the new version, but existing customers can always switch back to the previous “Classic Theme”, in the User Profile section at the top-right of the Main Menu.

Upgrade to the 2023 Release of SpendMap’s Free Purchase Order Software

Are you still using version 14.84 of SpendMap’s Free Purchase Order Software for Windows/desktop? It’s time to upgrade to the 2023 release.  Don’t worry; the upgrade utility will seamlessly bring forward all your data, history, settings, and more. This means you won’t lose any of your work in SpendMap.

To begin the upgrade process for your Windows/desktop system:

  1. Open SpendMap and go to HELP > CHECK FOR UPDATES. This action won’t install the upgrade immediately, but rather it will apply a patch to your v14.84 system.
  2. You’ll notice a distinctive red hyperlink at the bottom of the Main Menu in SpendMap.
  3. Click on this hyperlink to access full upgrade instructions.

Tired of Applying Updates? Try the Cloud Version!

We’ve got good news! SpendMap now offers Free Purchase Order Software in the Cloud. With the cloud version, you can forget about manual updates, backups, and other system maintenance. Give it a try today!

Regards,

The Free-Procurement Project Team
Totally FREE software that automates Purchase Orders and much more,
powered by SpendMap.

Upgrade your Free Purchase Order Software